If you’ve recently fallen in love with the beauty of birds in your backyard or at a local park, one of the first tools you’ll need is a good pair of birdwatching binoculars. The right binoculars can turn a distant blur of feathers into a clear, breathtaking sight — helping you identify species, observe behavior, and truly connect with nature.
But with so many types and specs to choose from, how do you know what’s best for beginners? Let’s break down everything you need to know before you buy your first pair of bird watching binoculars.
1. Understanding the Numbers: Magnification and Lens Size
When shopping for binoculars, you’ll see something like 8x42 or 10x50 printed on the model. Here’s what it means:
-
Magnification (the first number): How close the bird appears. 8x makes it look eight times closer.
-
Objective lens diameter (the second number): The size of the front lenses in millimeters. Larger lenses (like 50mm) gather more light but can be heavier.
Best for beginners: 8x42 — a perfect balance of magnification, brightness, and stability.
2. Field of View: Seeing the Whole Picture
Birds move fast, and you’ll want a wide field of view to track them easily.
-
A wider field means you can see more of the scene without moving your binoculars.
-
Models with 8x magnification generally offer a wider view than higher-power 10x versions.
Tip: Look for binoculars with at least 350 feet at 1,000 yards for smooth bird tracking.
3. Weight and Comfort: You’ll Be Holding Them a Lot
If you plan to spend hours scanning treetops or wetlands, heavy binoculars can quickly become tiring.
-
Choose lightweight designs (under 25 ounces) with ergonomic grips.
-
Consider a padded neck strap or harness system to reduce strain.
4. Lens Coatings and Clarity
High-quality lenses make a world of difference.
-
Fully multi-coated lenses enhance brightness and reduce glare.
-
Look for phase-corrected prisms (in roof-prism binoculars) for crisp detail.
You’ll notice sharper colors and better contrast — crucial for identifying subtle markings on birds.
5. Waterproof and Fog-Proof Construction
Since birdwatching often happens outdoors in unpredictable weather, choose binoculars that can handle the elements.
-
Waterproof binoculars prevent moisture damage.
-
Nitrogen-filled or argon-filled models resist internal fogging when temperatures change.
Even if you’re mainly birding in your backyard, these features can save you from frustration.
6. Eye Relief for Glasses Wearers
If you wear glasses, look for binoculars with long eye relief (at least 15mm). Adjustable eyecups help you set the right distance for a clear view without removing your glasses.
7. Budget and Brands for Beginners
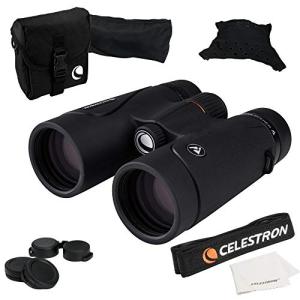
You don’t need to spend a fortune on your first pair of birdwatching binoculars. Excellent entry-level models range between $100–$250, offering clear, durable optics.
Popular beginner-friendly brands: Nikon, Celestron, Vortex, and Bushnell.
If you plan to upgrade later, look for warranties or trade-in programs from reputable retailers.
8. Practice Makes Perfect
Once you have your binoculars, spend some time practicing.
-
Try focusing on stationary objects first.
-
Then move on to birds — start with slower species like doves or ducks before chasing speedy warblers.
-
Keep your elbows tucked in to steady your view.
The more you practice, the more natural it will feel to bring your binoculars to your eyes and focus quickly.
Conclusion
Choosing the right birdwatching binoculars doesn’t have to be overwhelming. By understanding magnification, comfort, and clarity, you’ll set yourself up for a rewarding birding experience. Whether you’re spotting backyard blue jays or rare migratory warblers, a reliable pair of bird watching binoculars opens up a whole new world of wonder — one feathered friend at a time.